DIY Christmas Window Boxes: Real & Faux Greenery Step-by-Step Guide
Happy Thursday, friends! I’m excited to share some fun tips for DIY Christmas window boxes. I really love decorating our window boxes in every season and this year I found some wonderful new faux greenery.

Why Mix Real and Faux?
I love mixing together real and faux greenery for several reasons:
- Affordability – doing real greenery and only real can become very costly
- Faux greenery stays green long after Christmas so my window boxes still look good in March
- Mixing real in gives color, variation and warmth
- Faux can be used year after year
- Faux greenery is often easy to shape
Sources
Over the years I’ve collected lovely faux items that I use each year in different ways. Probably 10 years ago I invested in many branches, swags, and garlands from Jardin Craft. Sadly, the shop no longer exists. The quality, price, and variety was amazing in this store. These swags were from there:

I added the starfish but have used these swags here, in window boxes, on shelves etc.
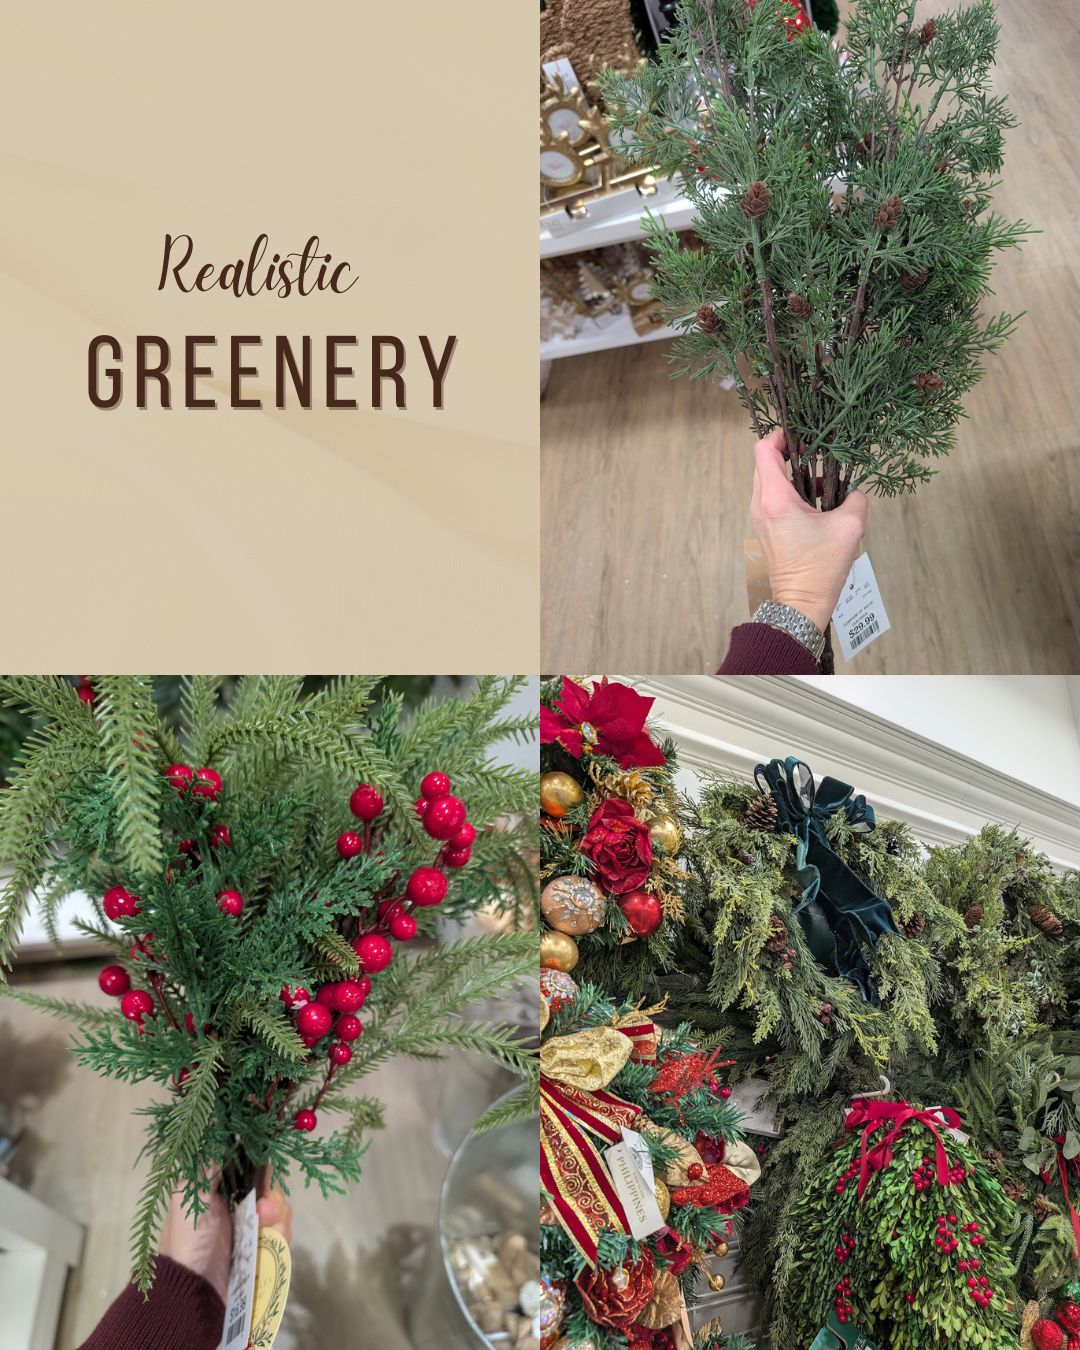
HomeGoods
The other evening I was at HomeGoods and found some amazing and affordable greenery – branches, glittery pine cones, and this gorgeous wreath:

Here’s the wreath on our door:

The wreath gives instant Ralph Lauren Christmas vibes, don’t you think? It was only $39.99. I absolutely love the green velvet ribbon.
As for the branches, I’m not sure how well the one with the berries will stand up but I got several branches for $16.99 so I thought it was worth a chance.
Ikea
We also found some lovely indoor outdoor evergreen trees at Ikea. They were only $19.99.

I took a few photos with these outside but I actually need more rocks to weigh them down. So I’m going to fill the planters out with river rocks and then place beach rocks on top. We plan on adding Christmas lights to the window boxes, little trees, and bushes. Conor and Luke will be helping me with the lighting.
Styling Window Boxes
I tried to take photos of the window boxes while I was working on them to give you a good step by step.
Step 1 – I start by using simple branches as the base:

Step 2 – Then I layered in different faux branches with a variety of colors.

Step 3 – adding some of the newer branches with berries and pine cones.

Step 4 – glittery pine cones and real greenery add warmth. I clipped real holly and real boxwood from our bushes. You could also forage for evergreen branches.


A Closer Look
Okay, here’s a bit closer look. I’m really glad I got the shimmery gold pine cones. They felt a bit gaudy at HomeGoods but that add a little texture and glimmer in the boxes. The real boxwood really adds something:

As does the pretty holly:

Here’s how the full window box looks complete. What do you think I’d love to hear!

A Peek at Our Simple Front Door
Here’s a peek at our front door. I wanted to go really, really simple this year. Little trees, swags, and that pretty wreath from HomeGoods.

This is only the start of our Christmas decorating but hoping it gave you some ideas for your own home. As I said in a previous post, I’m going slow this year because I love to decorate and really want to enjoy it this year. I’m still working on the inside of our home and we’ll be adding lights out here very soon.
More Inspiration
- Favorite Sources for Realistic Greenery
- Christmas in New England
- 27 Christmas Decorating Ideas
- Christmas Centerpiece
You may want to pin this for later:

Have you started decorating? I’d love to hear!
Join our newsletter for access to exclusive content, our favorite projects, easy recipes, and fun tutorials. You’ll receive the best design secrets delivered directly to your inbox! Sign Up Here!


Thanks Danielle for showing how you layered the greenery; your step by step gave me lots of great ideas for my own winter window boxes 🙂
Yay! This makes me so happy. I can’t wait to see your window boxes.
Hi Danielle. Your window boxes look lovely. Is the holly real or faux. It looks great!
The holly is real. I clipped it from my bushes in the front of our home.